Nano Banana: Floor Plan to Interior Design
Turning a single floor plan into a set of “client‑ready” room renders used to require CAD + 3D modeling + rendering experience. With nanobanana2, you can compress the workflow into: upload floor plan → specify a room/zone → generate the matching interior view. Add style reuse and consistency constraints, and you can produce a coherent “whole‑home” series.
1) The core idea: structural constraints first, visuals second
The floor plan is your structure lock. Your prompt should clearly state:
- which room/zone to render
- which proportions and openings must stay reasonable (doors/windows/walls)
- what deliverable you want (photoreal render, design concept, mood board)
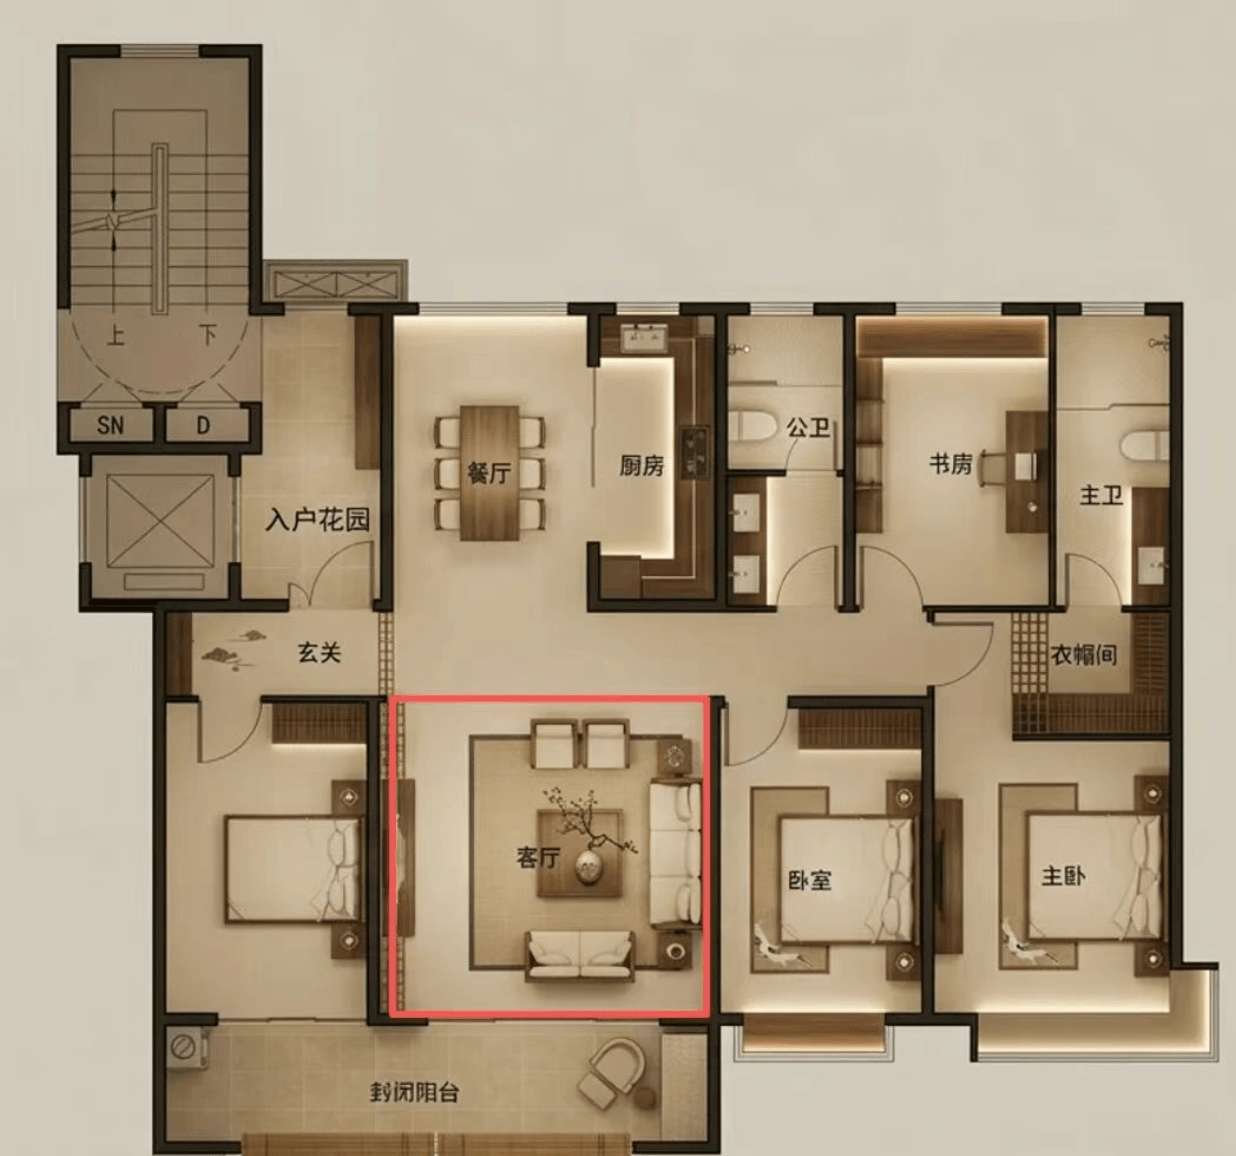
2) Practical workflow: floor plan → zones → multiple rooms
Step 1: prepare a clean floor plan
- clear boundaries (B/W line art or colored plan)
- fewer noisy annotations
- crop to the main plan area
Step 2: generate per room (living room / bedroom / kitchen)
Copyable prompt template (use with an uploaded floor plan):
Based on my uploaded floor plan, generate a photorealistic interior render for the [ROOM].
Constraints: keep the room proportions believable; doors/windows placement reasonable.
Style: [STYLE]. Palette: [PALETTE].
Materials: floor [..], walls [..], ceiling [..].
Camera: 24mm wide-angle, eye height 1.5m.
Lighting: daytime natural light + soft fill, clean and livable.
Output: 16:9, HD.
Repeat for: living room, master bedroom, secondary bedroom, kitchen/dining, entry, etc.
Step 3: keep a consistent “whole‑home look”
Consistency typically comes from locking:
- style keywords (minimal / wabi‑sabi / French vintage / modern)
- materials & palette (floor, wall, metal, wood tone)
- camera language (focal length, viewpoint height, lighting mood)
3) Advanced: extract style into JSON and reuse it
If you have a reference design image you love, extract its style into a structured “style pack”:
Extract the visual style of this reference into JSON:
colors, materials, composition, lighting, camera, effects, mood words.
Capture details so I can reproduce this look in future generations.
Then append: “Strictly follow this style JSON: {..}” in subsequent prompts.
4) Common failure modes (and how to fix them)
- proportions feel wrong → restate structural constraints; split into layout pass + render pass
- staging feels empty or cluttered → add “livable, good circulation, whitespace ratio”
- style drifts → lock palette/materials/camera; reuse style JSON
- textures look fake → specify seams, micro‑texture, clean reflections, consistent shadow direction
5) Summary
This workflow is ideal for fast concept options, marketing visuals, and content creation. Start with 2–3 rooms using the same template, then scale to full‑home series once your “skeleton” is stable.